Photographing Your Garden
by Sheila Sim
As a professional garden photographer and also as a devoted garden visitor, every year I eagerly await the arrival of the SGS Guidebook. I love the annual ritual of leafing through it and putting key ‘garden open’ dates in my diary.
In deciding which gardens to visit next, I am guided by the photographs on the SGS website. I’m not looking at them through my professional eye, but as a potential visitor deciding whether to make the trip next weekend to one garden or another.
I hope that the following tips might be useful to garden owners who want to publicise their garden for Scotland’s Gardens Scheme. Of course, the same suggestions apply for anyone photographing their garden for personal use. (A photobook is a great way to keep a visual record of your garden.)
You don’t need a professional camera to achieve great results. Modern smartphones are equipped with cameras good enough to do the job.
A range of breadth and detail
If you’re providing garden images for the SGS website, bear in mind that it’s not the quantity of images that matters, but the range and quality.
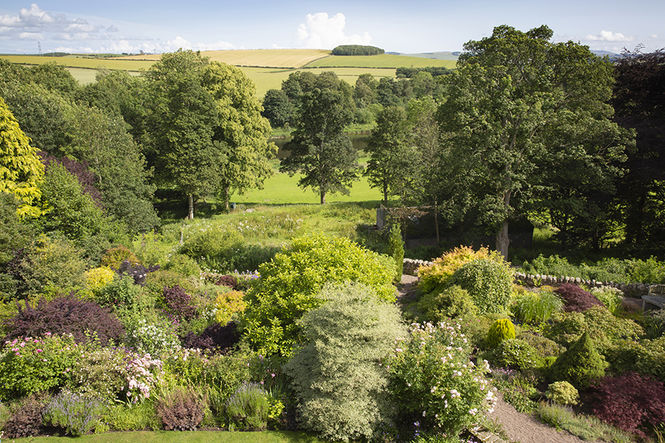
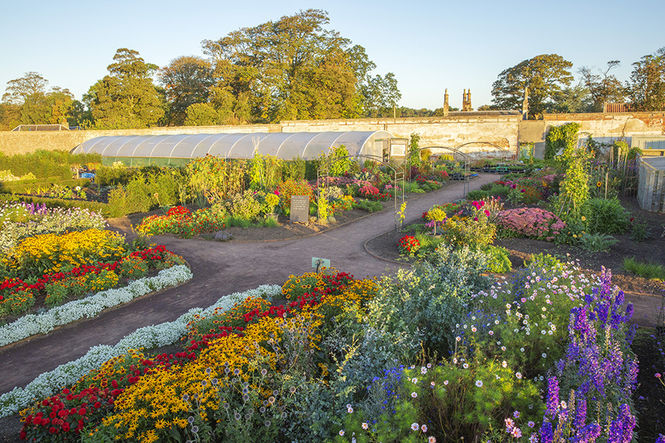
To set the scene for your future visitors, it’s a good idea to start with some ‘establishing shots’. These are images that give an overall impression of your garden and, ideally, how it sits in the surrounding landscape.
If taking a photo from your upstairs window gives you a clear view of the whole garden, it can be a good starting point. At Lennel Bank in the Scottish Borders, for example, the house and garden look over the river to the Cheviots beyond, and this image taken from inside the house gives you a good idea of how the garden sits within the local landscape. [IMAGE 1] If possible, also take a photograph of your house in its garden setting.
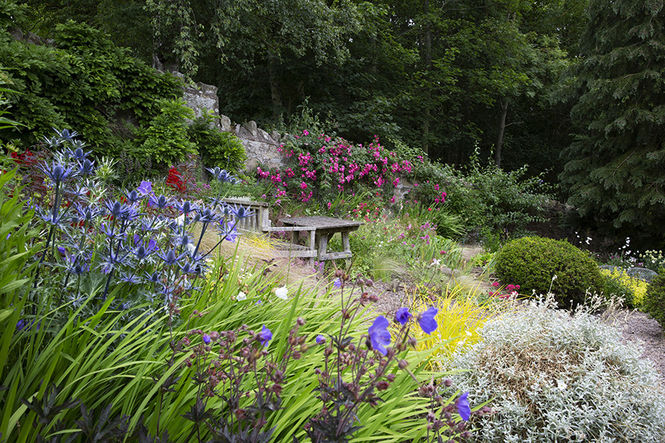
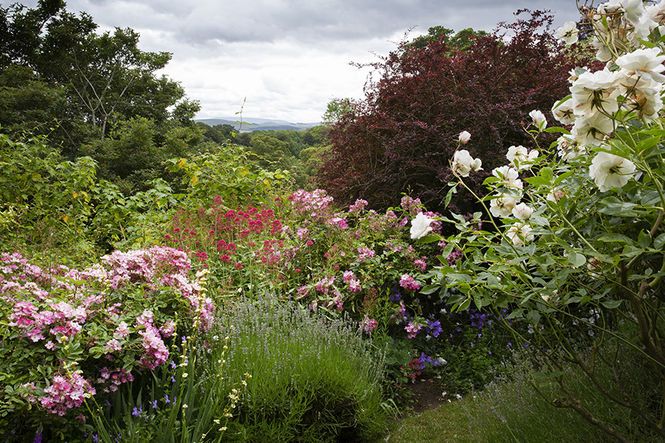
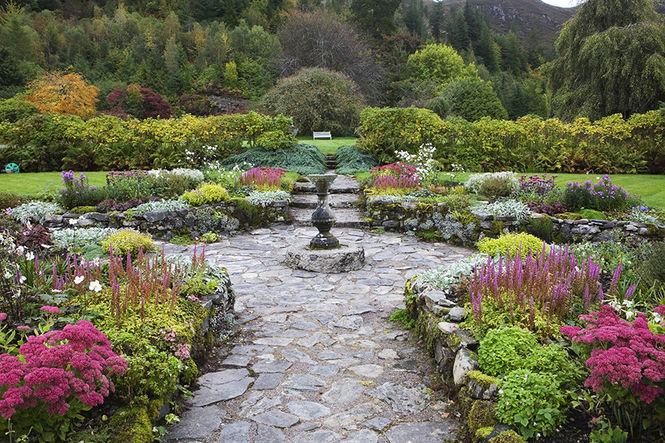
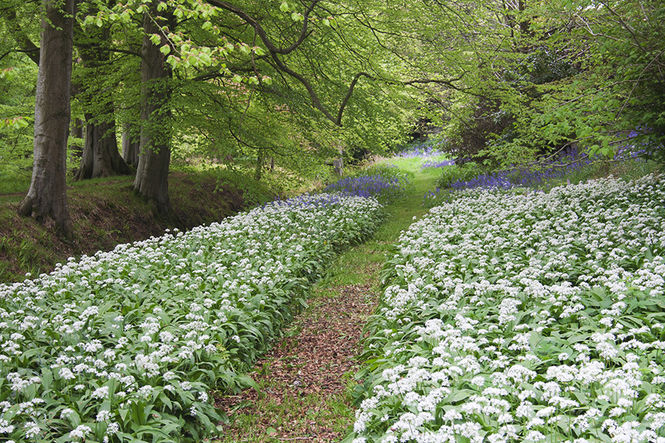
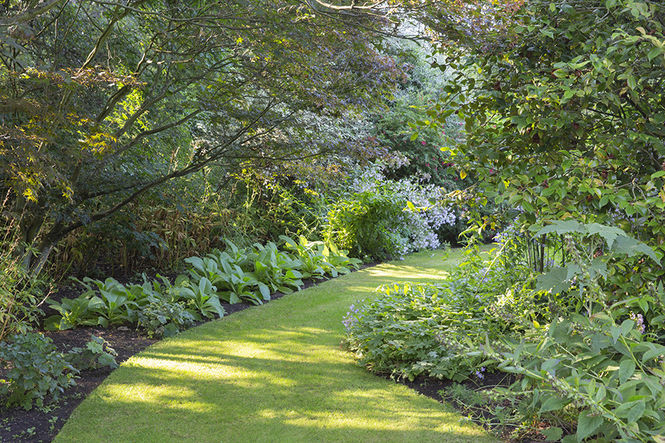
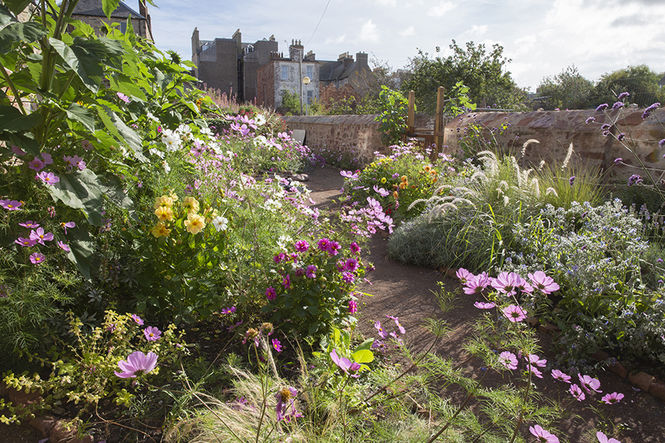
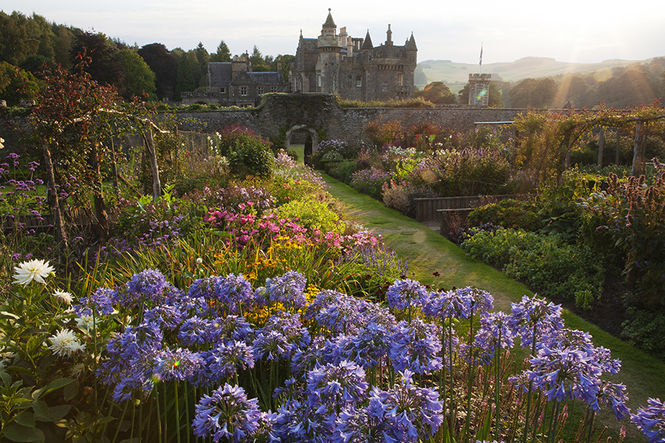
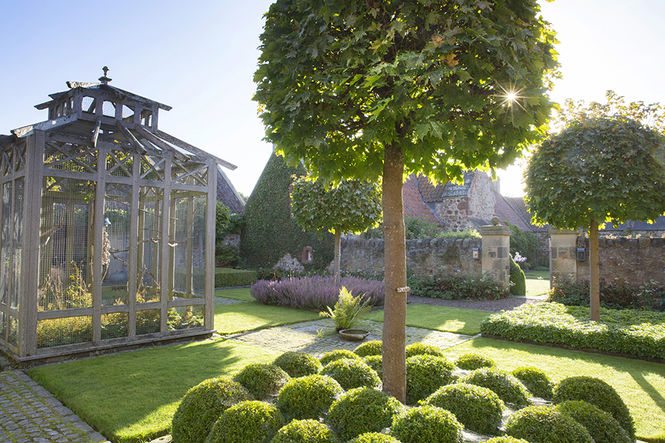
Having taken your establishing shots, you can start to take a closer view and capture some medium-range shots to emphasise certain areas or features of the garden. These might include a herbaceous border, a piece of garden art surrounded by plants, a seating area, or a ‘room’ within the garden. Staying with Lennel Bank for a moment, here are a couple of medium-range images that start to give an idea of the planting in different areas. [IMAGES 2 and3]
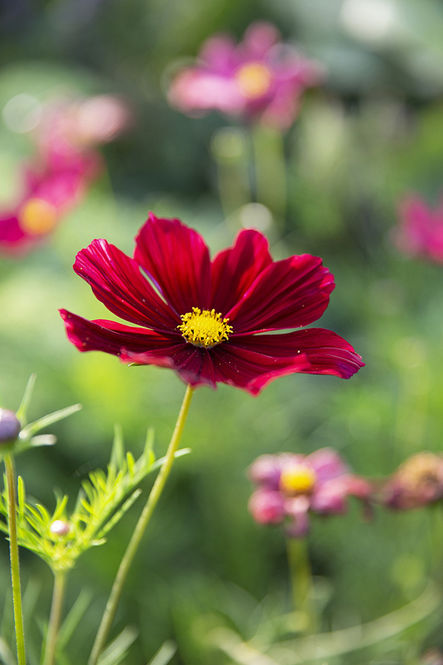
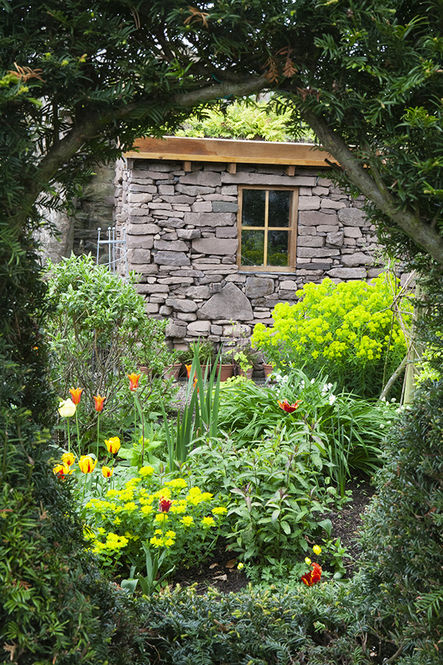
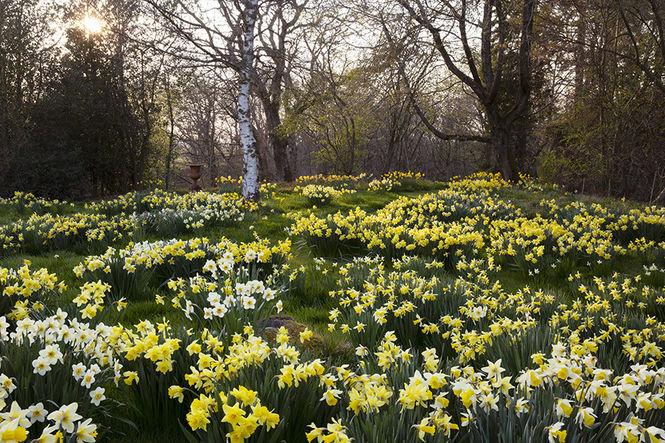
Finally, if there are certain plants that you’re particularly proud of, take some close-up shots to show off those beautiful details.
When taking a close up shot, keep it simple. Try to ensure there are no distractions in your frame; by adjusting your composition slightly, or moving your camera just a fraction, you can isolate the best background to show off your subject (IMAGE 4].
Composition
You can rarely go wrong if you use the classic ‘rule of thirds’. This rule says that for a balanced and interesting composition, you need to place the interesting points of your image in either the intersections or a whole line of an imaginary 3×3 grid. This image of Attadale is a case in point. [IMAGE 5]
The use of leading lines is also a great composition technique for garden photography. Leading lines can be formed by paths, walls or hedges, and you can place them in the frame in such a way that they guide the viewer’s eye: perhaps to a point of interest (such as a statue or fountain), or leading seductively out of the picture so that you wonder what lies beyond – such as the paths at Pitmuies and Tyninghame. [IMAGES 6 and7]
Alternatively, you might like to frame your image – perhaps through a gate, an archway or a gap in a hedge (as shown here at Shepherd House). [IMAGE 8]
It’s surprising what a range of images you can obtain by simply altering your position. Consider using a ladder (safely) to gain some height, as I did here at Archerfield Walled Garden. [IMAGE 9] Or crouch down for a lower angle. I always carry a bit of plastic sheeting in my camera bag so I can lie on it to photograph flowers from an insect’s eye view.
Instead of taking an image of your prized herbaceous border from the outside in, can you carefully position yourself within it, looking out? Clearly you need to be careful not to disturb the planting, but it can be a great way to frame a view of the rest of your garden. This is what I did here (taking great care not to step on any plants) at the Backlands social enterprise garden in Dunbar. [IMAGE 10]
Be aware of distractions. Look all around the frame before you take the image, and check that the background doesn't include any stray people, garden tools, noticeboards, splashes of red or bright highlights - these will all draw the eye away from your subject.
Similarly, pay attention to the foreground. For example, a large expanse of gravel footpath in the foreground doesn’t make for an attractive photograph; maybe you can you step a few feet to the left or right, or crouch down, so that the path is screened by nearby planting.
Consider light and time of day
You may think that the best garden photos are taken on a cloudless day with bright sunlight, but this is usually not the case. Direct sunlight creates harsh shadows, and these are unflattering in garden photography. To avoid them, the best time to photograph your garden is when the sun is lower on the horizon – that is, either early in the morning or towards sunset. These sunset photos at Abbotsford and Humbie Dean show the gardens in a lovely, warm light. [IMAGES 11 and 12]
If you’re photographing on a sunny day, having the sun close to the horizon has another advantage: you can use backlight. For this, place the subject of your photograph between you and the sun. This can be counter-intuitive at first - instinctively we feel the sun should be illuminating the subject from behind us – but with a bit of practice you’ll find that this usually leads to better images. Of course, you should never look directly at the sun, nor attempt to include the sun in your image. Rather, keep the sun out of frame or position yourself so it’s blocked by trees or some other barrier (as seen here at Broadwoodside). [IMAGE 13]
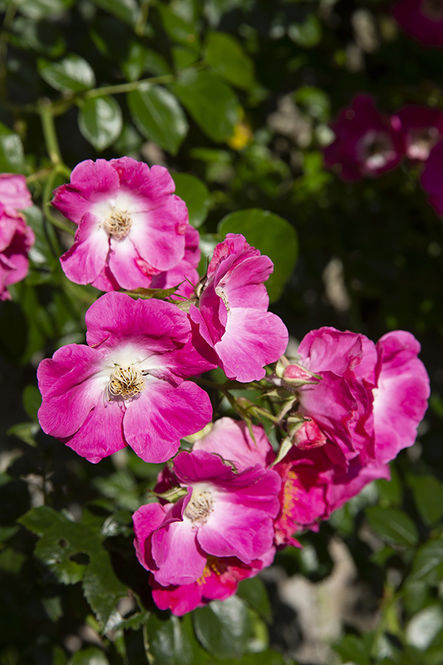
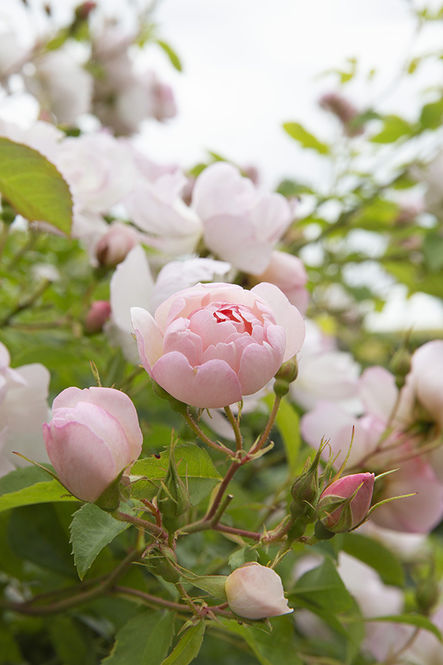
Overcast days are also great for any kind of nature photography. High clouds do a great job of diffusing the light so you don’t have hard shadows. The image of Attadale, above, was taken on a very overcast day in October – but as you can see, the vibrant colours in the garden stand out nicely in the diffused light. The two close-ups of roses also illustrate the difference: in direct, bright sunlight Rosa ‘American Pillar’ looks garish, whereas overcast conditions do justice to the subtle tones of the pale pink rose (whose name I foolishly forgot to note). [IMAGES 14 and 15]
No matter what the light conditions are, it’s not a great idea to include a lot of sky in your garden photos. Featureless skies don’t add anything to an image, and bright skies tend to draw the viewer’s eye away from the subject; try eliminating the sky altogether.
If you have a professional camera, experiment with depth of field using aperture control. Take one image with both the frame and the subject sharp, and another with your subject sharp and the background blurry – see which you prefer. The image of the Cosmos flower was taken using a large aperture (in this case, f3.2), which isolates the bloom and blurs the background. You may have this capability built into your mobile phone; if not, you can download an app.
Every garden is unique, with its own feel and character. Hopefully these tips will inspire you to capture yours in all its glory – if not for the SGS, then for a photobook that you can look back on with pride in years to come.
About the author
Sheila is a professional garden photographer, based in East Lothian. She also hosts tours of Scottish gardens for Russian visitors. Sheila works primarily in Scotland, but also in Russia and in Portugal, where she has a home in the beautiful Beira Alta region.
Sheila Sim’s website: https://www.sheilasimphoto.com/
Did you enjoy this article? Also check How to Create Straw Bale Garden
